Step 2 • Receiving Mail from Other Mail Servers
The Mail Server Panel
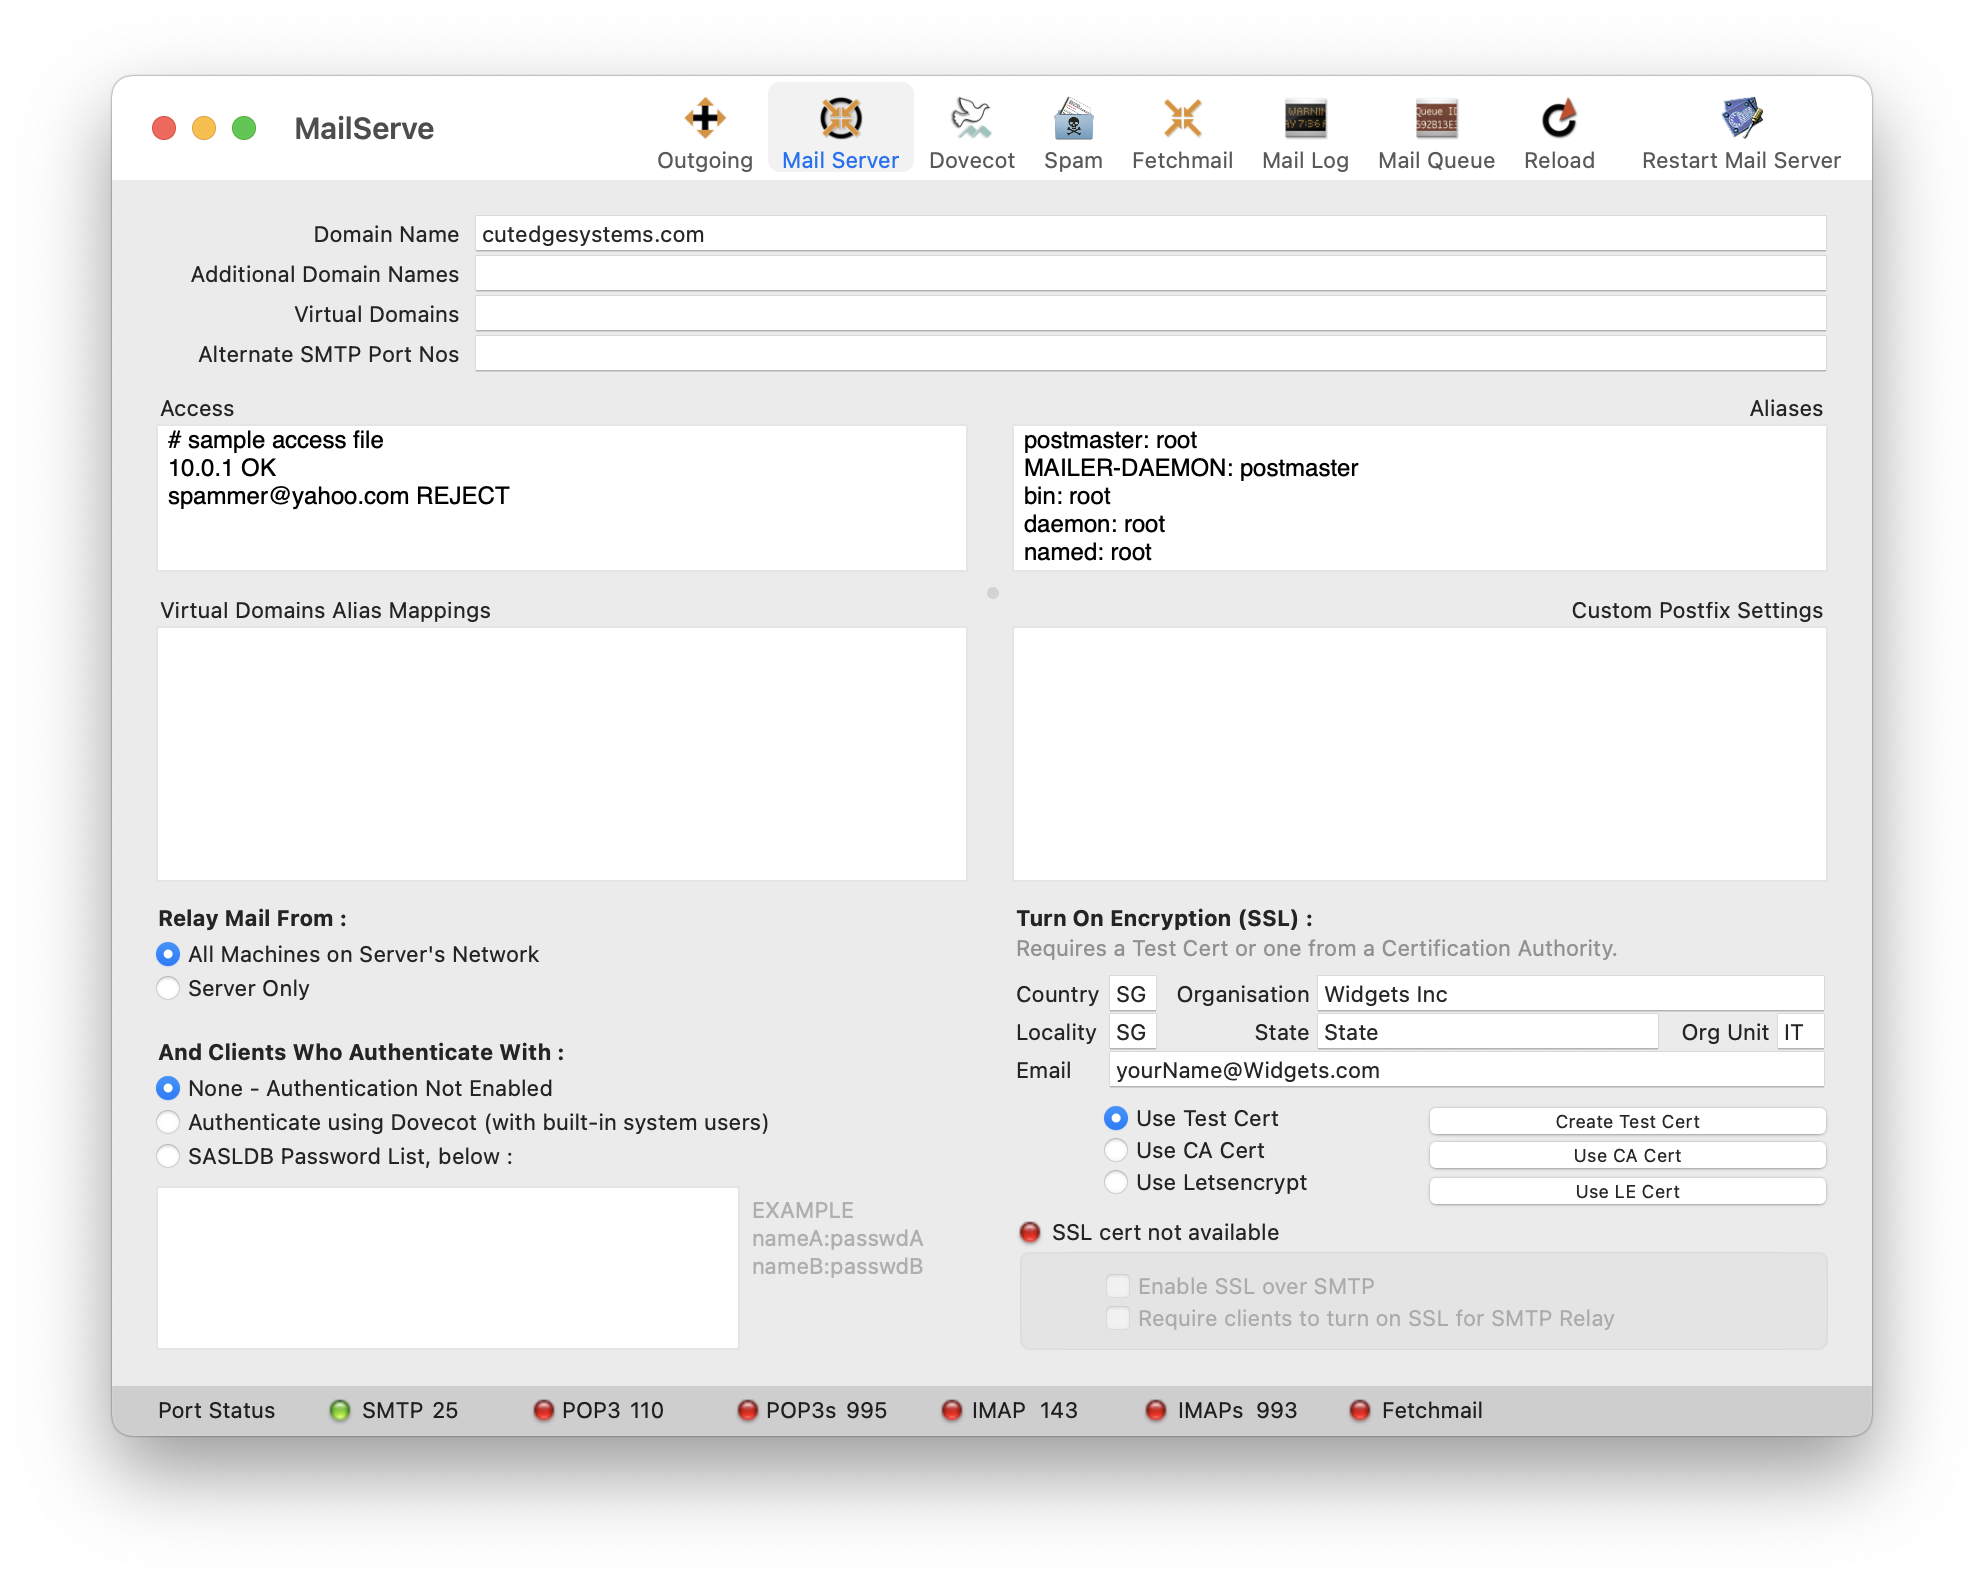
If your server has a domain name, and is reachable via its domain name by other mail servers on the Internet, then, so long as the Postfix SMTP server is running, it is also able to receive mail sent by these other servers.
All you need to do is to tell Postfix which domain it is supposed to receive mail for. You enter the domain name into MailServe's Domain Name field, as shown below, and click the Restart Mail Server button to make the setting "stick”.
Viewing the Stored Mail—Using the Dovecot POP3 or IMAP Server
The Postfix SMTP server does the job of talking to other mail servers, sending mail to and receiving mail from these other servers. All incoming mail is stored in an Inbox—one for each mail user on the server.
The job of providing a view into these stored mail for every mail user is done by Dovecot, which provides both a POP3 and an IMAP server, and which you can turn on at the Dovecot Panel.
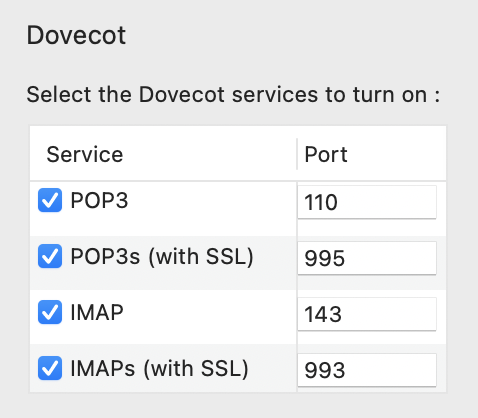
If you turn on POP3 and IMAP on Dovecot (ignoring their SSL variants for the moment), the Port Status lights on MailServer should look like that below :

Authentication
We assume that Postfix is running and the POP3 or IMAP server is also running, and the server is reachable via its domain name.
Assume also that the domain name is "cutedgesystems.com" and the mail user's account name is "bernard" (which is the MacOS short name as created using the Accounts Pane in System Preferences).
This is how we would set up the "Relay Mail From" parameter in MailServe so that the server will relay mail from all machines on the local network which successfully authenticate with it. Machines outside the network are blocked from sending mail.
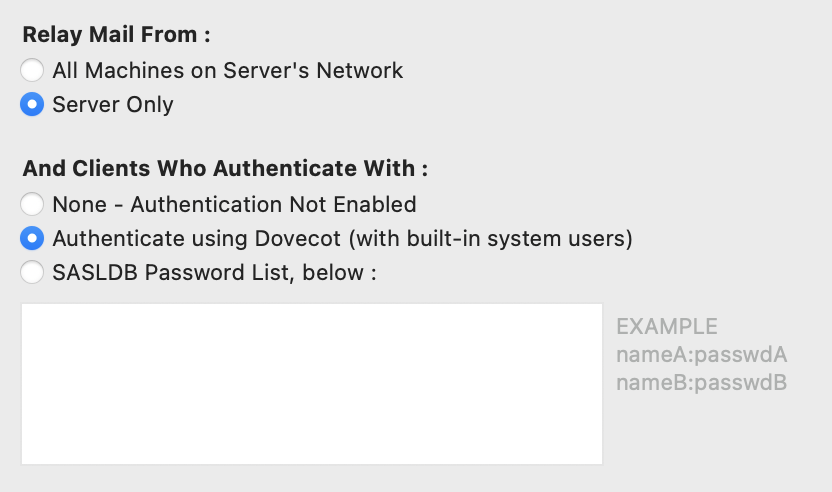
This setting will not only allow mail clients relay mail out through the server. It will also allow the mail client to retrieve mail from the server, either via POP or IMAP. (IMAP is recommended because it provides the user with a user-definable folder/sub-folder structure).
Setting up the Mail Client using Mail.app
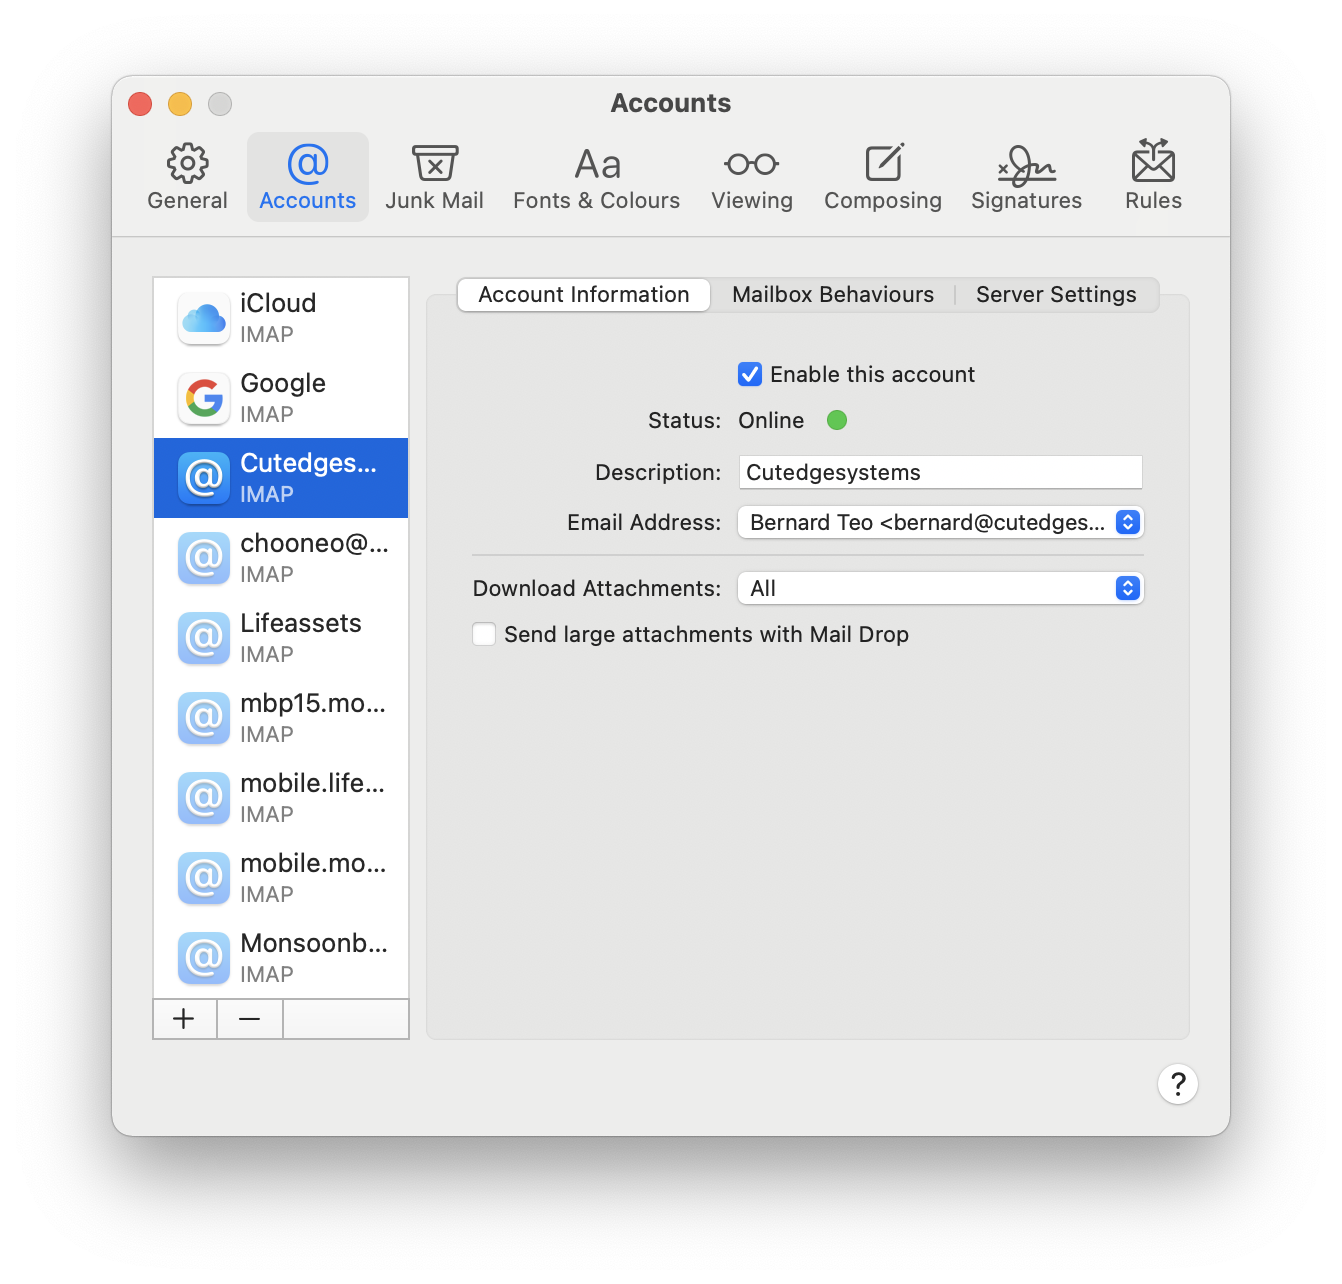
This is how you would set up Mail.app, assuming we are accessing the IMAP server as the Incoming Mail Server (the user name and password are the same as was created for a MacOS user account on the server).
First, create a new account (+ sign, bottom, left).
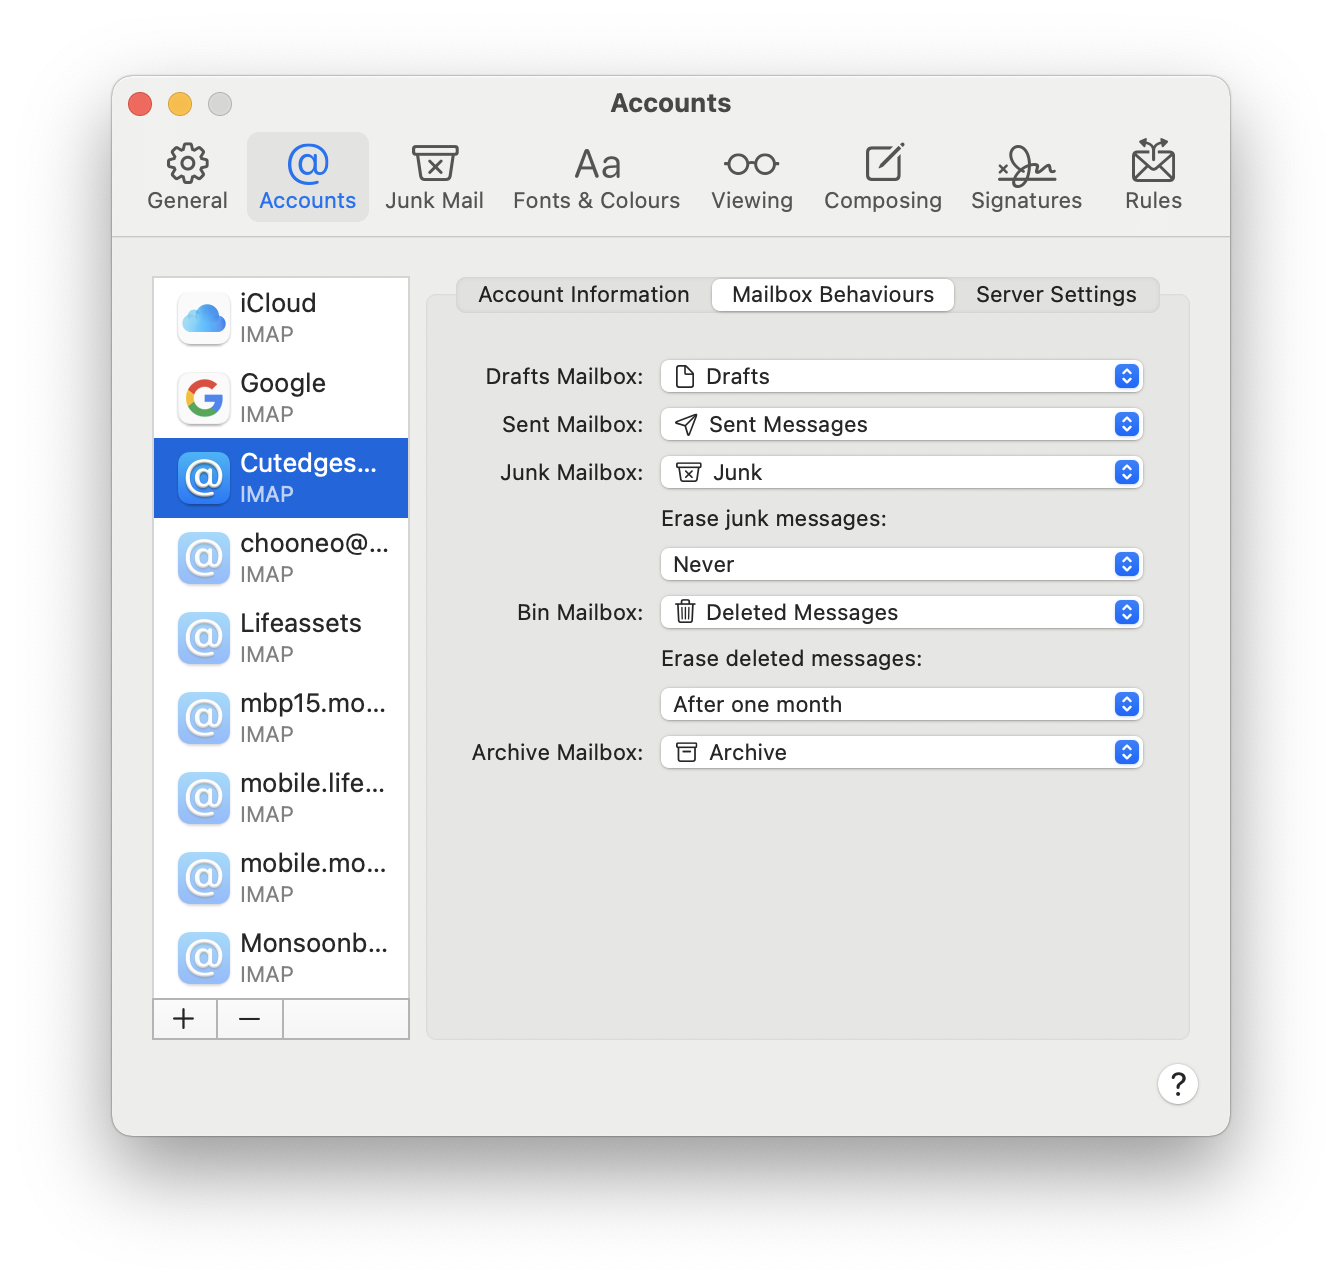
Second, this is how the MailBox Behaviours panel would look like (leave them at their defaults).
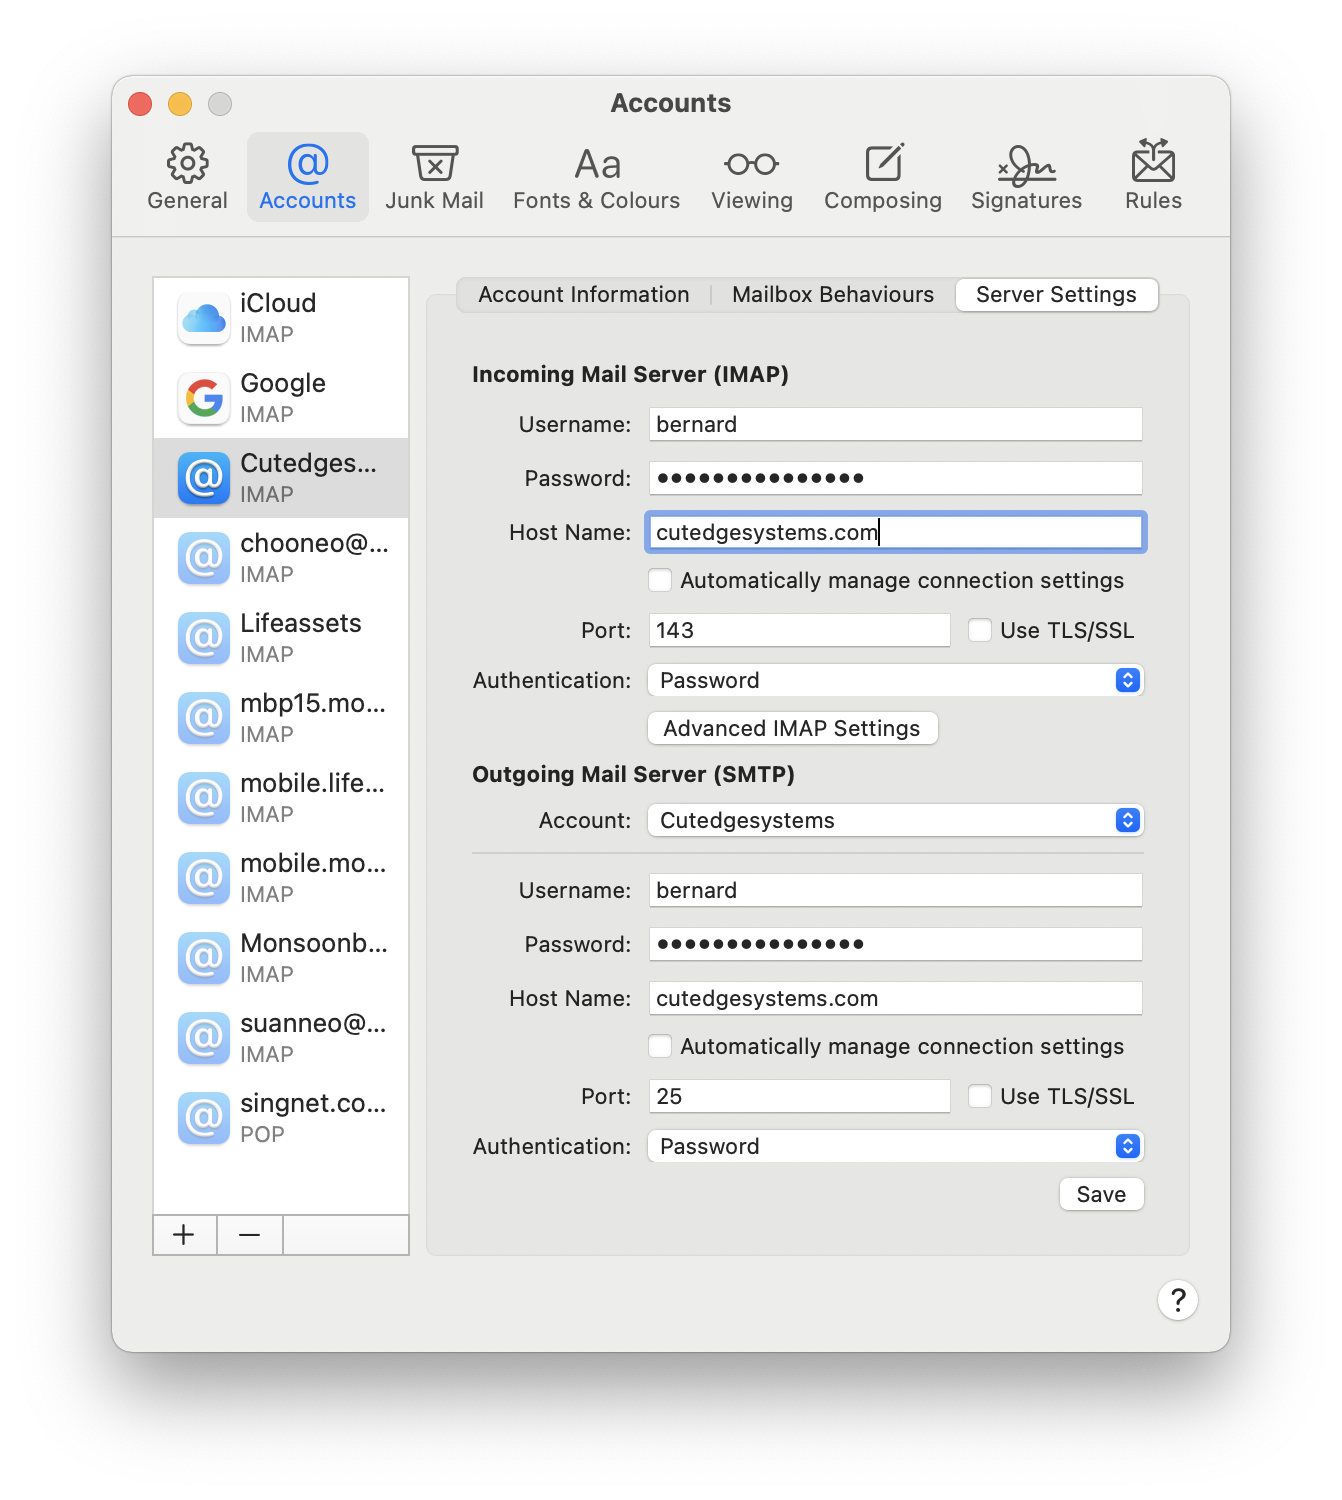
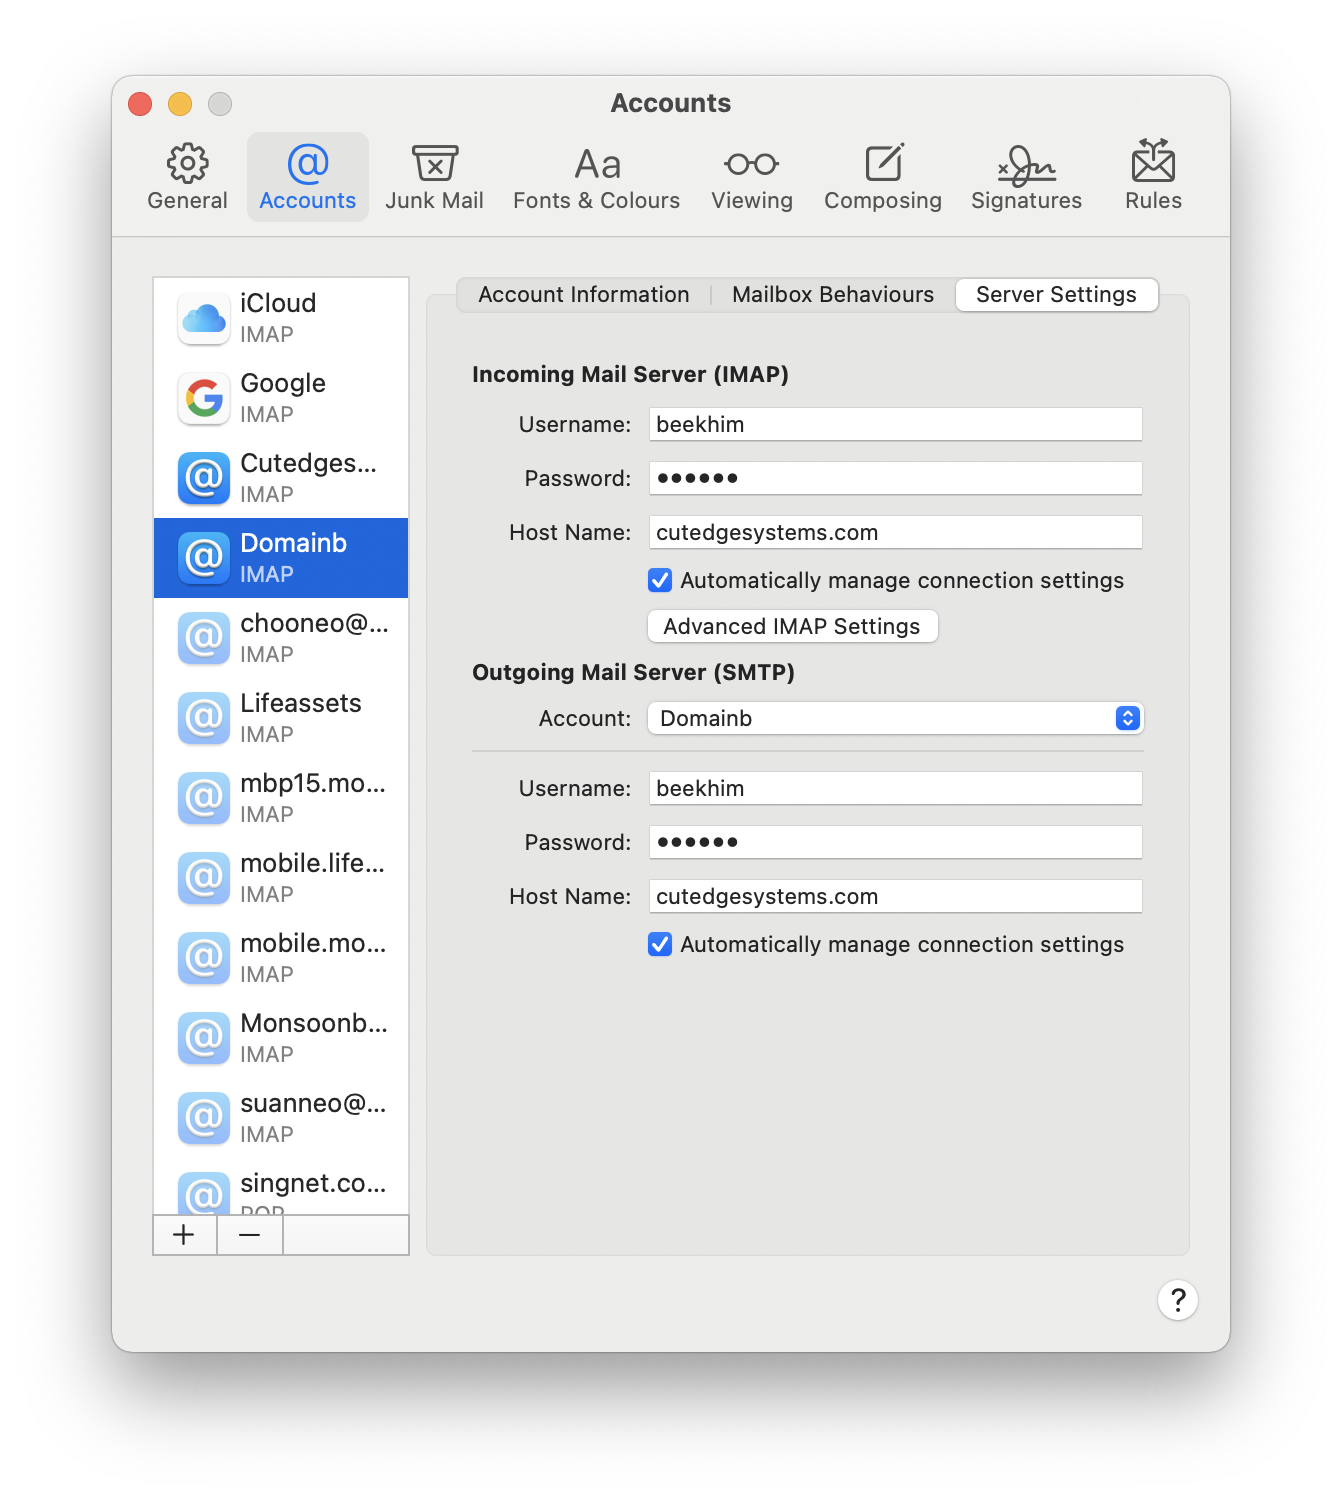
Third, this is the Server Settings panel (leave SSL off, for the moment) :
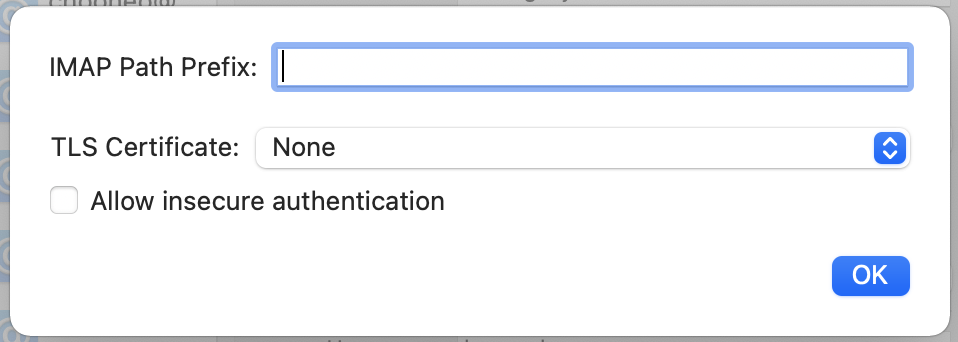
Finally, click the "Advanced IMAP Settings” button,
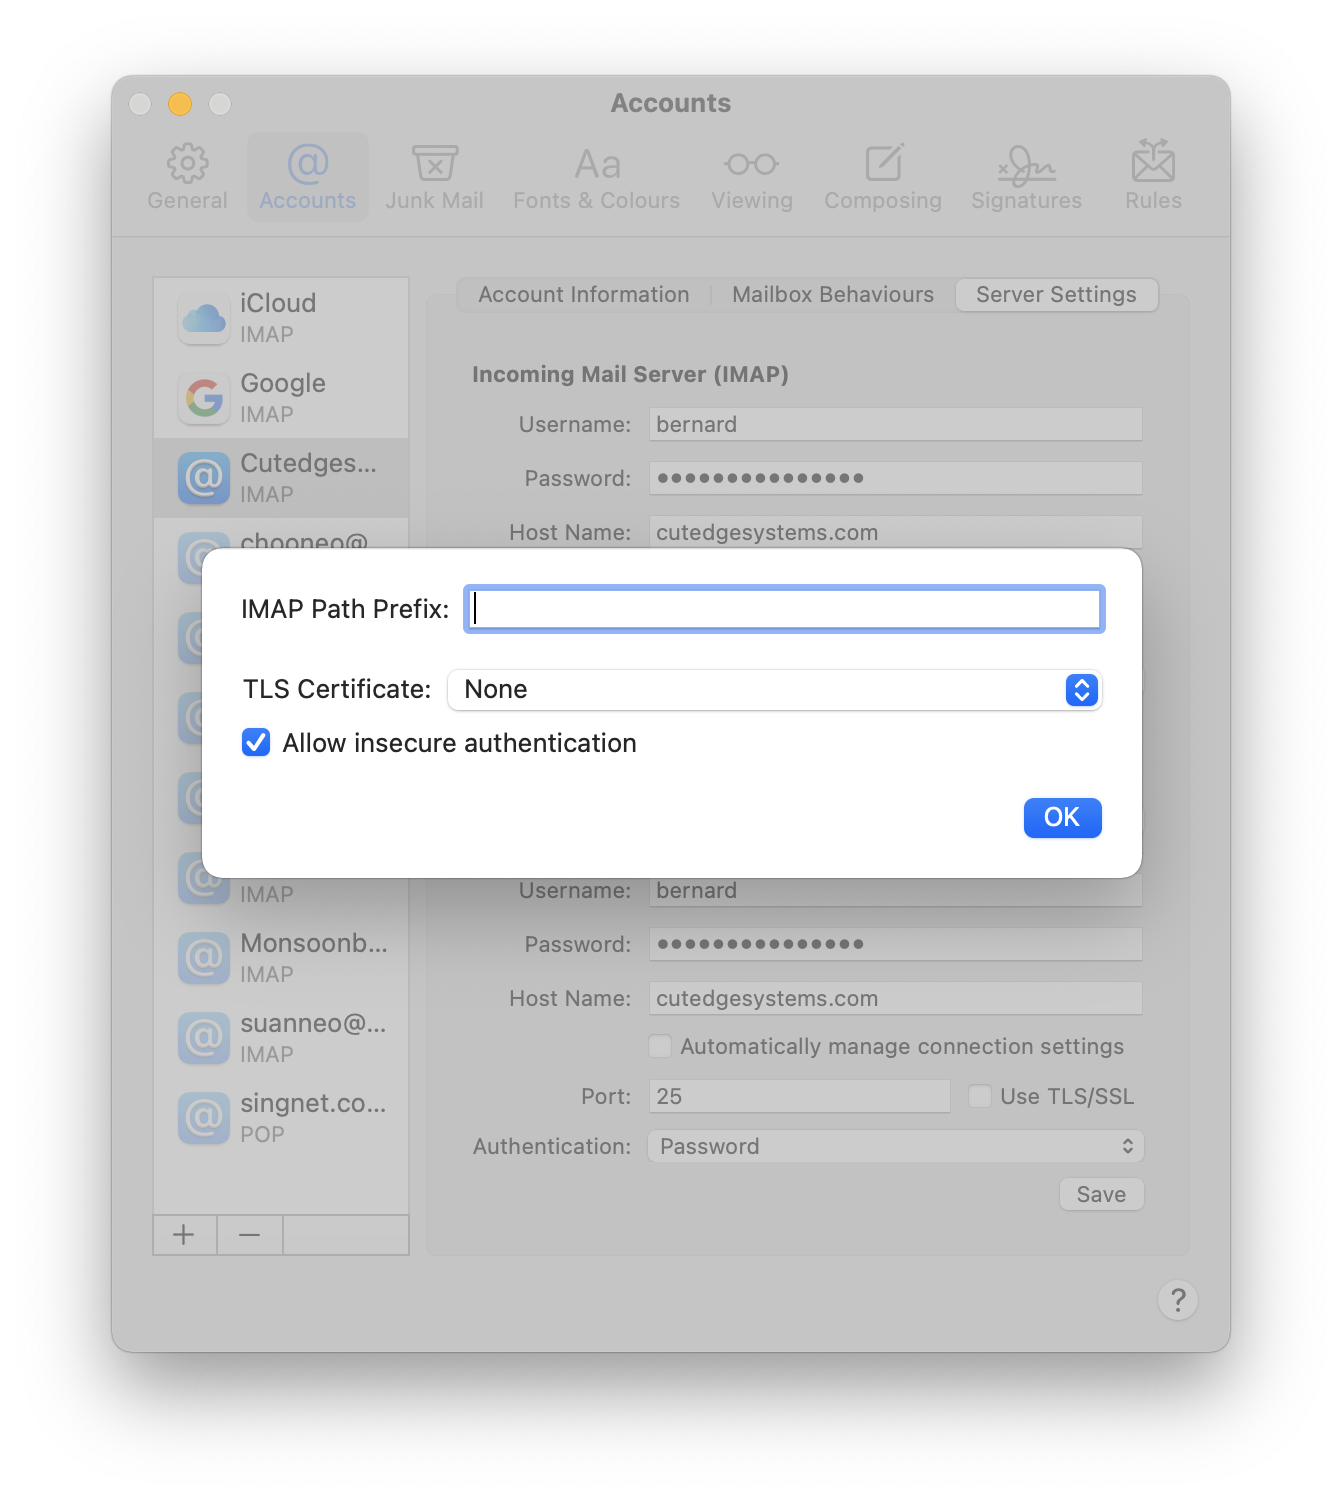
Click the “Allow insecure authentication” check box (because we hadn’t turned SSL on and so all our communication with the mail server would be insecure, but that’s all right for the moment — we can turn on SSL later).
Save the account setting, go the Mail.app Viewer window. Compose an email to that email account you just created. See if you can receive it. Reply to it. Check that the reply also went through. If everything is working correctly, it’s time to turn on SSL.
Turning on SSL
At this point, you have a safe and fully functioning mail server that relays for all legitimate, authenticated users but is secured against spammers.
You can improve its security by turning on SSL and encrypting the message streams between server and client, both for sending and receiving mail.
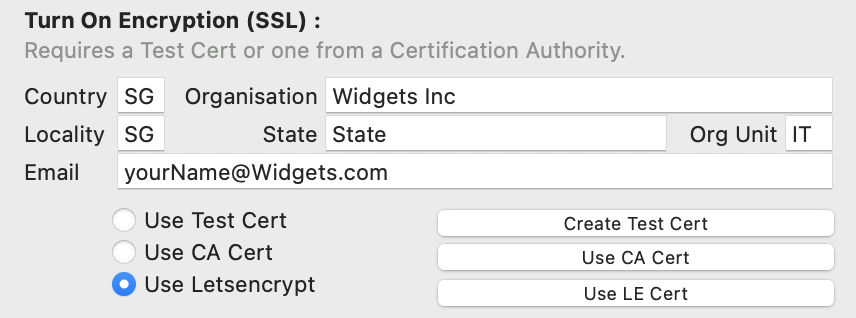
MailServe helps you create a test SSL certificate so you can turn on SSL mode for the server. Edit the SSL parameters in the MailServe interface to fit your needs (but keep to two characters wherever I've used two characters in the sample data entry fields). Then click on the "Create a Test Cert" button :

The MailServe interface will show that SSL is available for SMTP and you can turn it on by clicking on "Enable SSL over SMTP", as shown above. You can even require that SSL be turned on in the mail client.
In the Dovecot Panel, set POP3s (with SSL) and/or IMAPs (with SSL) to be on :
Click on Restart Mail Server. The status lights at the bottom will show the SSL ports to be on.

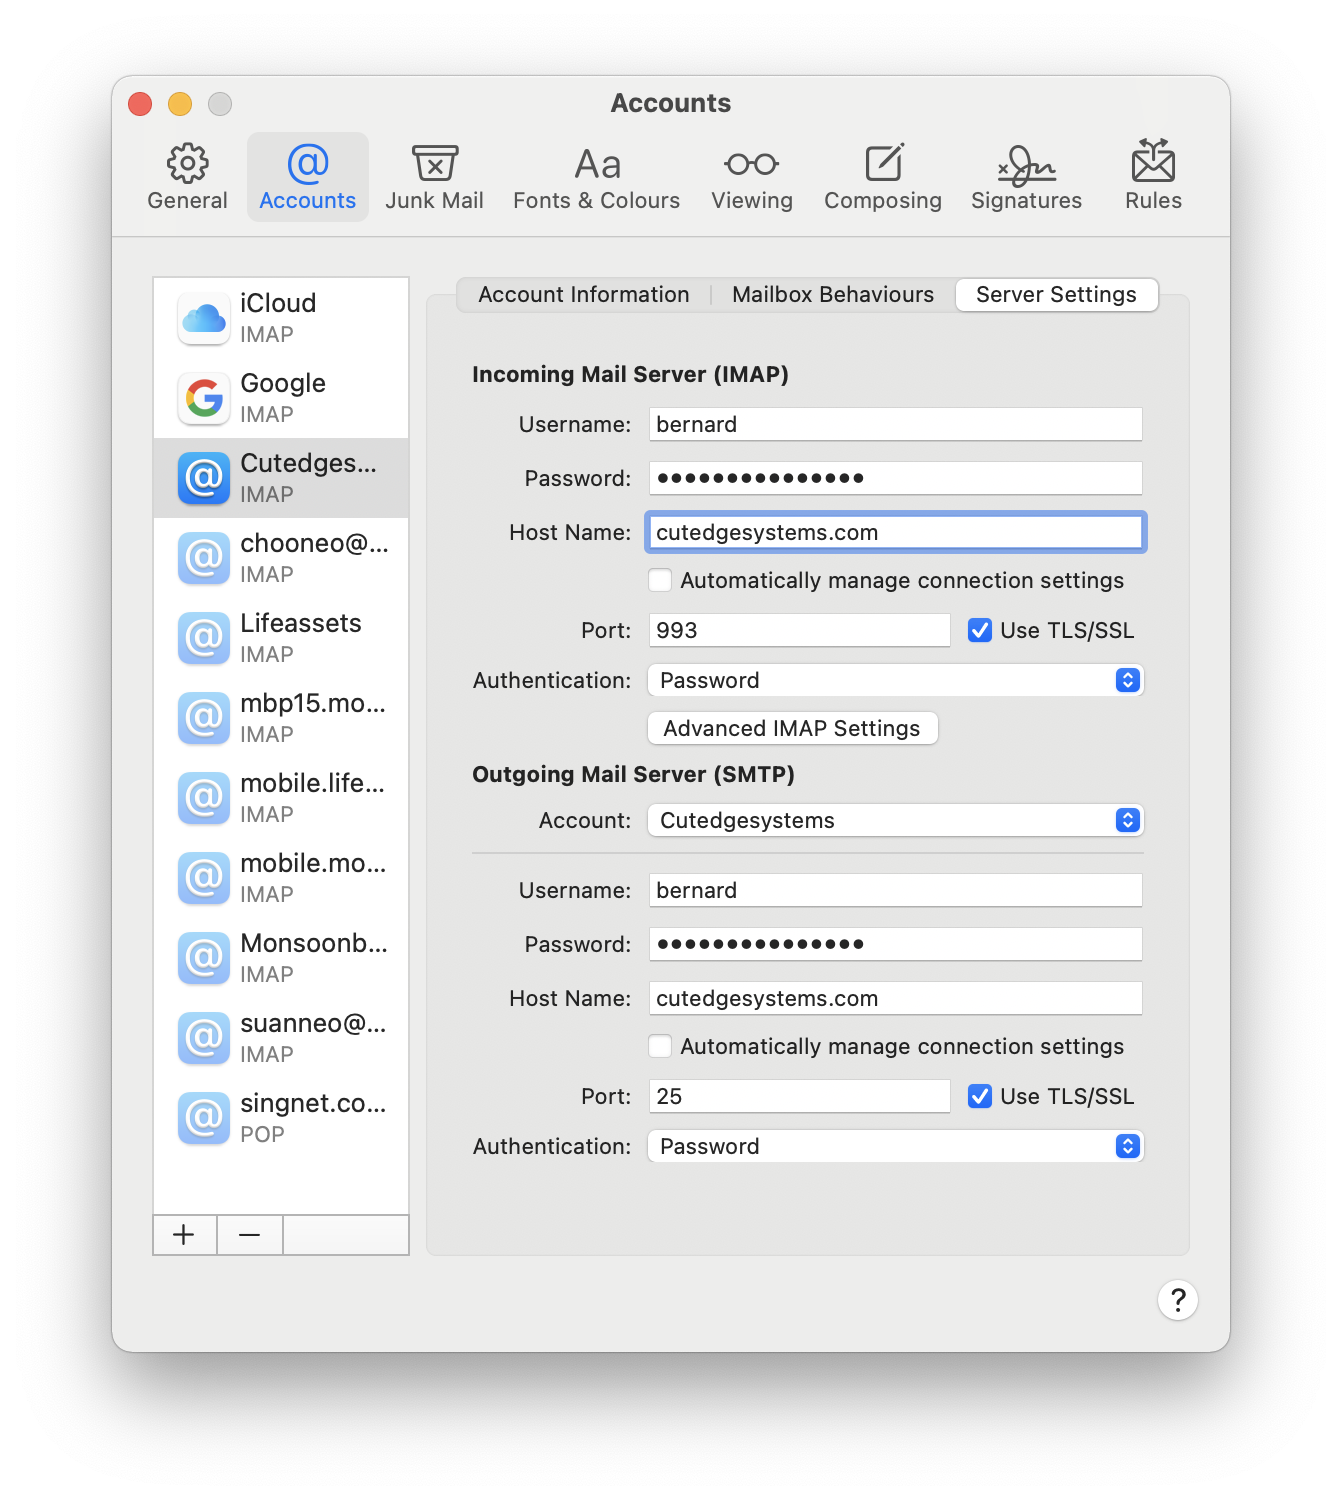
This is how you set up the mail client, Mail.app, to offer to negotiate both the IMAP and SMTP connection over SSL (click on the "Use TLS/SSL” check boxes) :
Don’t forget to turn off the “Allow insecure authentication” check box :
Using Certs from a Commercial Certification Authority (CA)
You can replace the test cert with a "real" cert that you buy from a Certification Authority (CA). MailServe includes a streamlined interface that can help you request for a cert from a Cert Authority and then help you pair the returned cert with its original private key (that was created at the cert request stage).
You access this facility by clicking the "Use CA Cert” radio button and this what you will see, a 4-stage process to acquire an authentic certificate from a Cert Authority:

Using Letsencrypt Certs
Finally, there is a third way to use SSL certs — MailServe on Monterey allows you to create and use Letsencrypt certs, which are standards-compliant, first-class SSL certs that are also free.
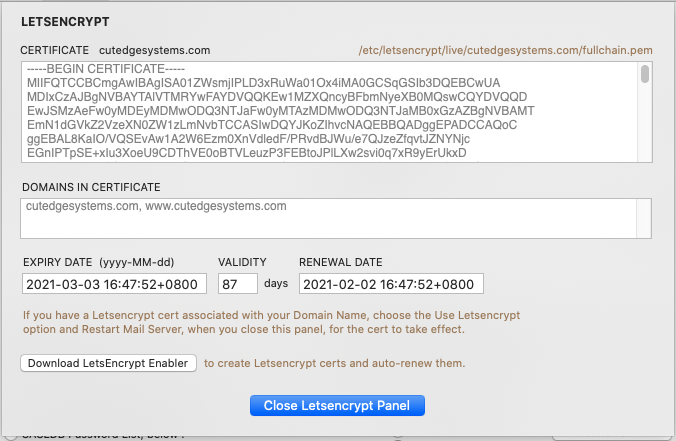
You can generate Letsencrypt certs by downloading the free Letsencrypt Enabler app, which makes it easy to generate Letsencrypt certs with just one click.
To use Letsencrypt certs in MailServe, choose the Use Letsencrypt radio button option :
Letsencrypt Enabler will take care of automatically renewing the certs it created and restarting the Mail Server to use these renewed certs.
Using Other Features of the Mail Server Panel
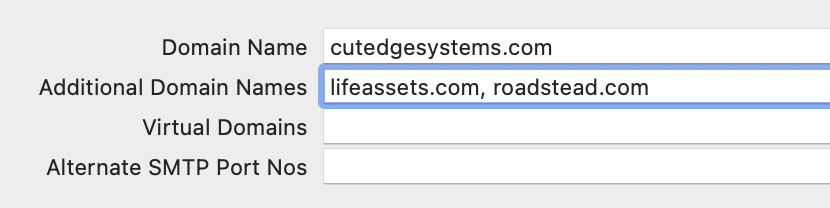
Additional Domain Names
If your server hosts more than one domain, you can list the additional domains in this field (separated by commas, e.g., lifeassets.com, roadstead.com) so that Postfix knows that it has to accept messages sent to these domains.
Make sure that these domain names work first and that they're also pointing correctly to your server machine.
There is no separation between users into particular domains. For example, on my server, mail for bernard@cutedgesystems.com and mail for bernard@roadstead.com will both reach me in my single mail box on the server, under the user name “bernard".
To get mail for sales@cutedgesystems.com and sales@roadstead.com sent to two different mail boxes, you need to set up Virtual Domains.
Virtual Domains
Ordinarily, even if you receive mail for two domains - domainA.com and domainB.com - sales@domainA.com will use the same mailbox as sales@domainB.com. But, using the Virtual Domains field, you can make things work a bit differently.
You need to create two separate user accounts on the server first, say, brendan and beekhim, respectively. Then make sure that the two domains, domainA.com and domainB.com, are listed in the Virtual Domains field.
Then you can use the Virtual Domains Alias Mappings field to point sales@domainA.com to brendan's mailbox and sales@domainB.com to beekhim's mailbox, as shown below :
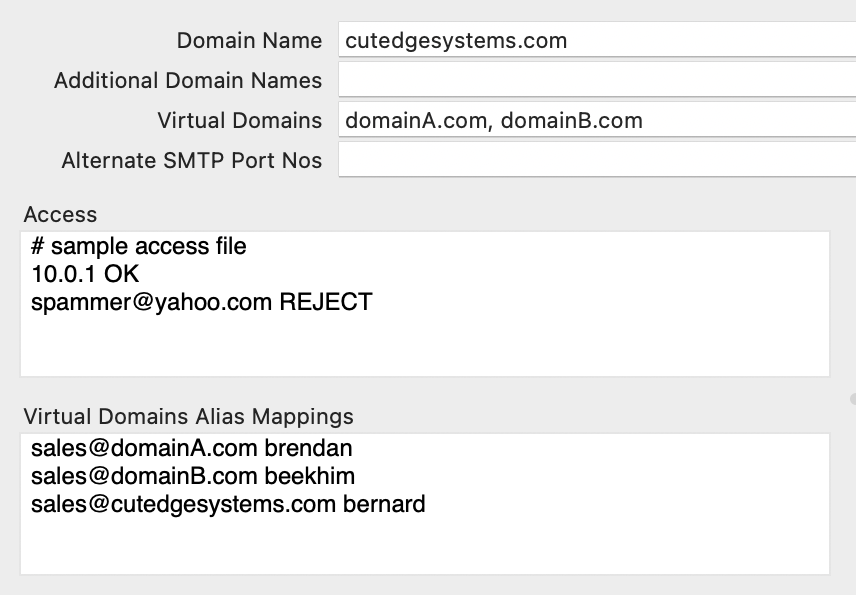
Note that you can also add an entry for sales for the primary domain (i.e., sales@cutedgesystems.com, above) and point it to another mailbox (i.e. user account) on the server.
This is how you manage the sales@domainB.com account using Mail.app :
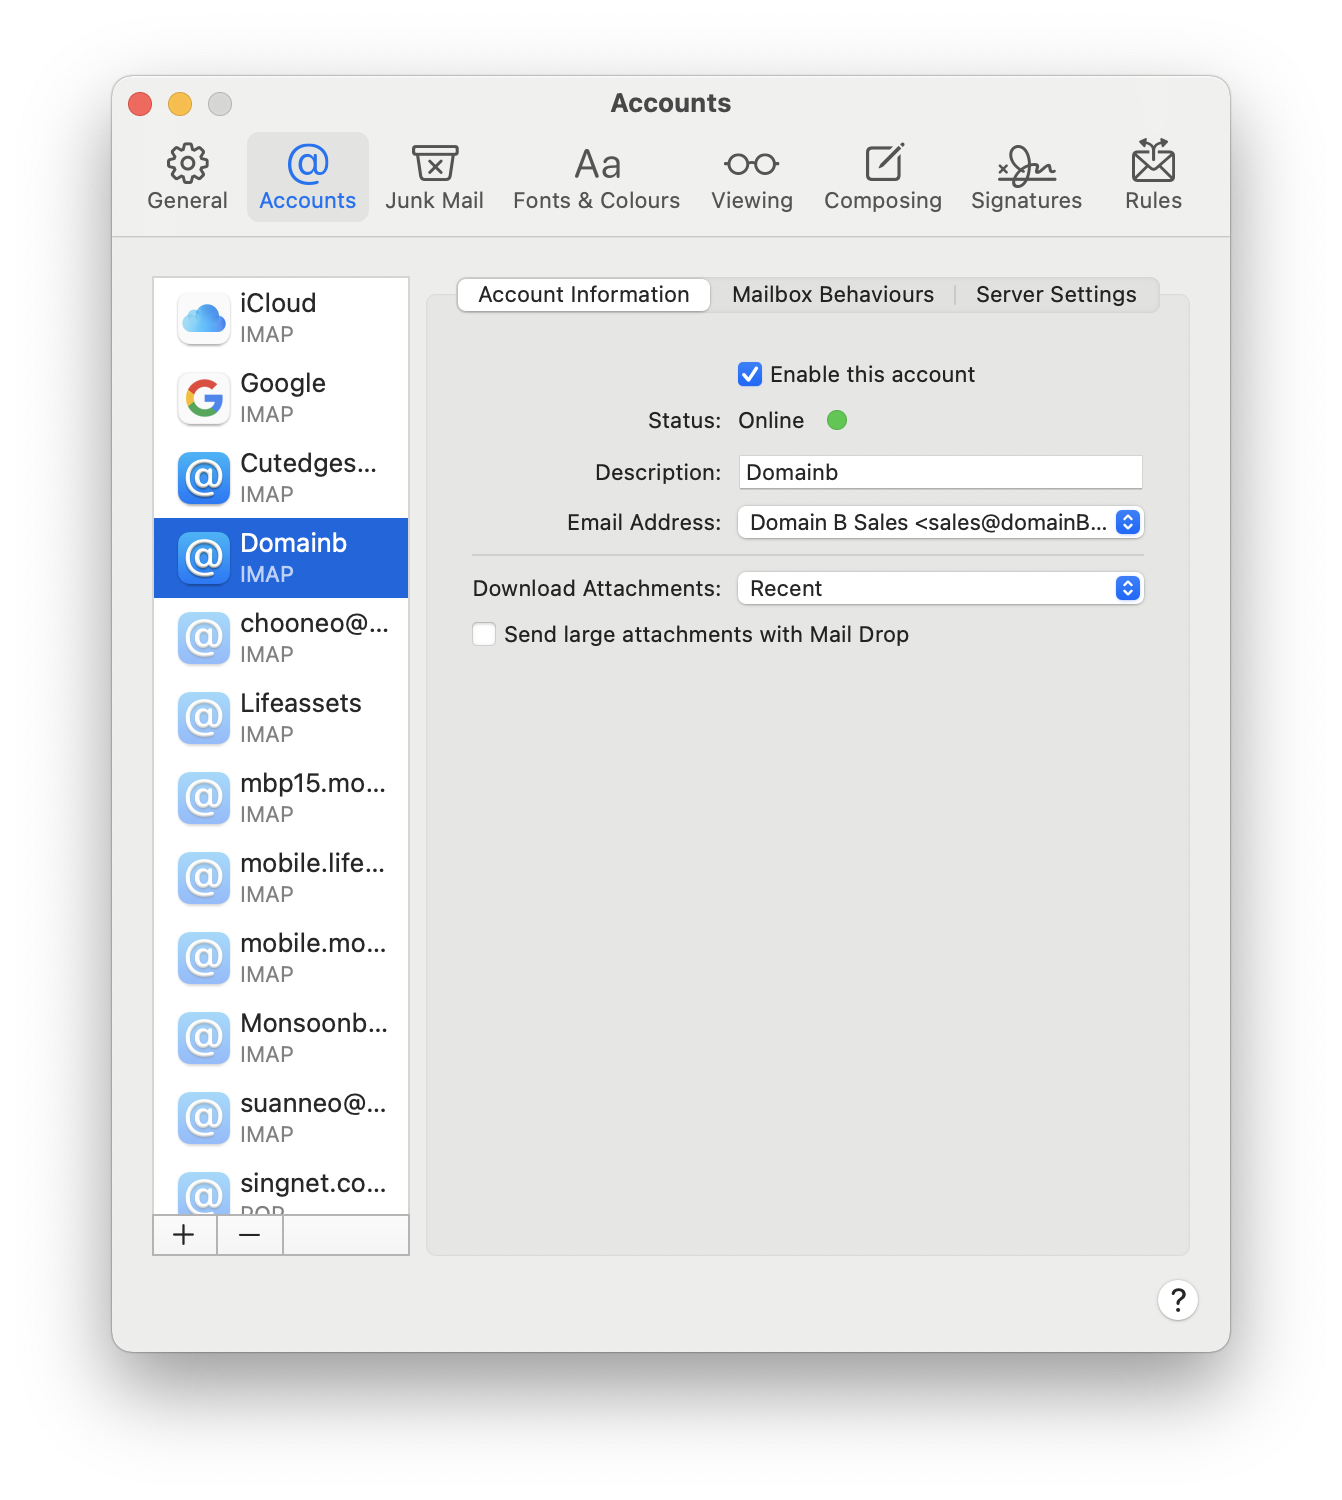
The messages for sales@domainB.com will go to the mailbox of the real user, beekhim, on the server.
Alternate SMTP Port Numbers
This allows the server administrator to open more ports (beside port 25) for mail clients to contact it. For example, it may be useful to add port 2525 (and also 52525, separated by a comma). This way, if your users happen to be on a network that blocks outgoing mail from using port 25, your users would still be able to relay mail out your server by switching their mail clients to use either port 2525 or 52525.
You can also use this field to open more ports for other mail servers to contact your server, to deliver mail to it. For example, you may be attempting to set up a mail server on a network whose ISP blocks incoming port 25. This way, no other mail servers will be able to deliver mail to your server. There is a way around this, that people using DynDNS.org's MailHop feature (for example) have expoited. But you need to open an alternate port that MailHop can use to contact your server (check the dyndns.org example). Set this port number in MailServe's Alternate SMTP Port Numbers field.
The Aliases Field
Some required entries for Aliases are already created for you. Each site needs to have a Postmaster and a Root user so that other ISPs and you own system processes can contact a responsible person when they find problems with your system. MAILER-DAEMON is the conventional name attached to bounced messages. When senders find that their messages have bounced, they may need to contact someone for clarification. Their replies to their bounced messages will go to MAILER-DAEMON, so you need someone to pick these up.
The first line in the example, below, shows that you can create e-mail groups quickly by entering a group name on the left-hand side of an Alias entry, and entering a series of user names, separated by commas, on the right-hand side, which can include users from other domains.
nightrunner: haihwee,beekhim,brendan@sky.com
postmaster: bernard
root: bernard
MAILER-DAEMON: bernard
mailist: :include:/full/path/name/to/mailinglist.txt
The last line in the example, above, shows another way of creating e-mail groups - by pointing the mail server to a file that contains a list of e-mail addresses, with one address on each line.
You can also send all mail destined for a specific user into the black hole :
baduser: /dev/null
The Custom Postfix Settings field
This is meant to allow experienced Postfix users to add their own modifications to the Postfix configuration that have not been taken care of by the MailServe user interface. These will not be over-written when you do a Restart Mail Server.


The serial number & download link will be displayed in the browser after payment, and will also be sent via email.
Note :
Also, I’m still updating the MailServe for Monterey documentation.
Download
MailServe for Monterey
Please provide the email address you used to purchase the product, together with its serial no:
This is a Universal "fat binary”, with both ARM and Intel “slices”.
Contact
Bernard Teo
New! Download
This is a Universal "fat binary”, which will install HomeBrew and Letsencrypt Certbot in /opt/homebrew-cutedge in either ARM or Intel versions.