|
MailServe Snow—An Overview Set up a fully buzzword-compliant mail server on Mac OS X Leopard that can:
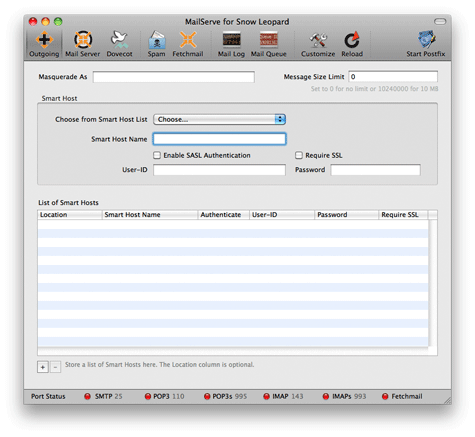
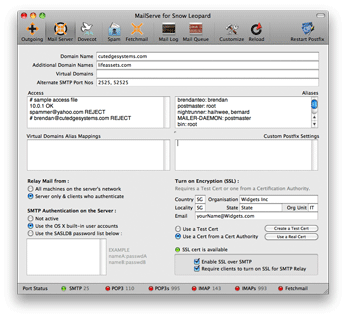
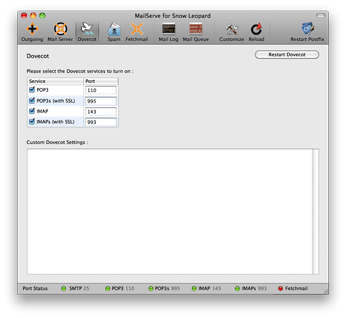
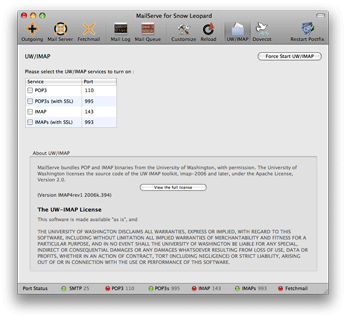
MailServe organises each of these tasks—from the simple to the complex—into discrete panels in its user interface. This allows the user to turn the mail services on one-by-one, and turn them off individually when they're not needed. There's a reason for this organisation. It allows the user to fix problems—with their setup or their network—step-by-step and layer-by-layer, so even novice users can turn on a fully-powered mail server. MailServe does a lot of complicated configuring of your server beneath its Mac-like user interface. It does this in a non-invasive manner, touching as little as possible of the original system files so as to leave your system in its pristine state. And you can remove all the files installed by the application, at one go, from the De-Install option in its Help menu. But it does help if you try to run MailServe on a clean, newly-installed OS X Leopard machine, just so the application doesn't get derailed by any unexpected custom modifications already made to the system files. On a clean Leopard system, MailServe would just work, as we say, the Mac Way. Installing a Mail Server on Snow Leopard—Step-by-Step Guide
|
|
|||||||||||||||||||||||||||||||||||||||||||||||||||||
|
|||||||||||||||||||||||||||||||||||||||||||||||||||||||
|
|
|||||||||||||||||||||||||||||||||||||||||||||||||||||||
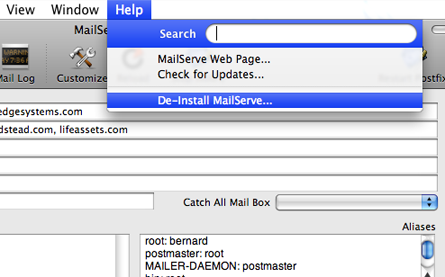
| De-Installing MailServe
You can de-install MailServe by using the menu item, shown below, in the Help menu. It will shut down any mail-related service that is still running, and remove all files installed by MailServe. MailServe works from its own folder in /usr/local/cutedge/postfix, in which are stuffed the main.cf, master.cf and other files used by Postfix. The original Postfix files in /etc/postfix are left un-touched and so MailServe leaves your system in its original state after de-installation. MailServe Snow includes new binaries and config files that are specific to Snow Leopard. You can do a de-install to clear the files left over from the previous Leopard versions of MailServe, if you have saved the configuration using the File menu. When you read back the configuration and Start Postfix, you will get all the new binaries loaded for use with Snow Leopard.
The Help menu also contains links to the MailServe for Snow Leopard web page and it can be used to check that web site for new versions. |
|||||||||||||||||||||||||||||||||||||||||||||||||||||||