 |
|||
| WebMon for Mavericks WebMon configures OS X's built-in web server to support server-side includes, execCGI, PHP, SSL (including support for inserting Intermediate CA certs) and WebDAV, for multiple domains running on the same server. With WebDAV turned on, your web server acts like an iDisk, allowing you to connect to the WebDAV folder remotely, securely, and directly from the Finder, so you can save, share, and distribute your files and folders. You can also use the WebDAV folder to share your iCal calendars. WebMon also helps you set up the web server so that you can monitor its log file from a remote machine. WebMon is able to help you monitor any number of web servers from a single remote machine.
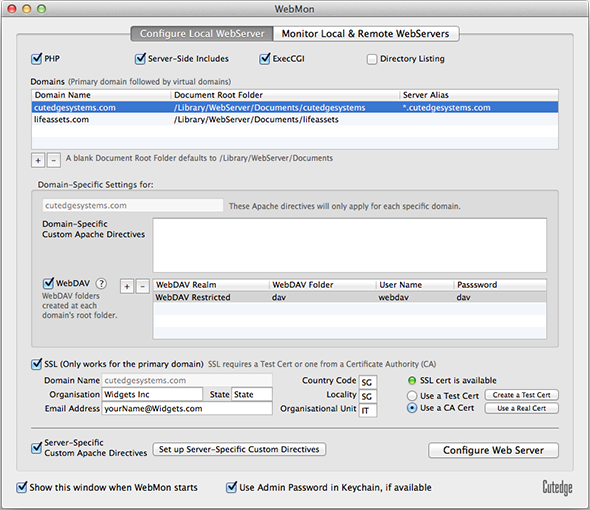
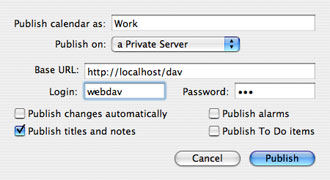
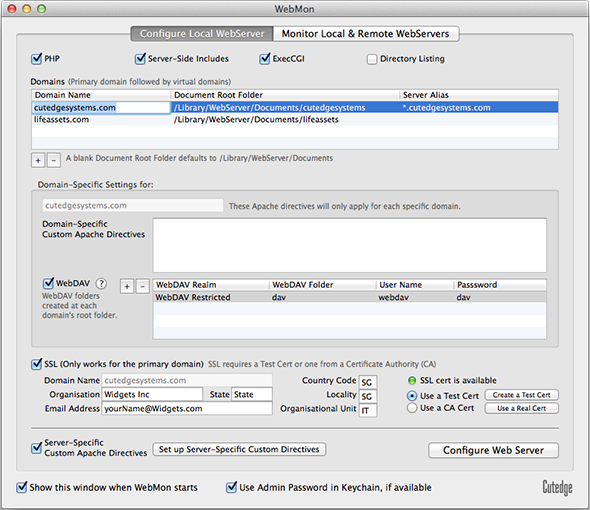
The following guide assumes that you're setting up a server sitting on an IP address, 10.0.1.250, and that you can refer to the server either via its domain name (say, in our case, cutedgesystems.com) or via the name "localhost". When you first run WebMon on the server machine, you will see WebMon's "Configure Web Server" window, above. You will see a single WebServer line created by default , and that is for the server, localhost. If you have a working domain name or host name for this server, you can enter that name into the Domain Name column. The first panel in the WebMon's "Configure Web Server" window allows you to turn on PHP, Server-Side Includes, execCGI and WebDAV, and turn off Directory Listing, while giving you the option to make a back-up of the current config file, build from the default Apache config file, or base it on the one you have existing on your server. Turning on WebDAV You can create multiple WebDAV folders, each with its own user name and password combination. There is a WebDAV Help button, that will show you how the four editable WebDAV parameters - WebDAV Realm, WebDAV folder, User Name and Password - will appear in the OS X authentication dialogs when you try to publish an iCal calendar or access a WebDAV folder from the Finder's "Go / Connect to Server" Menu. There is also a "Turn on Directory Listing" check box which will turn on auto-listing of directories, for when you want to share folders of files and images with people who have not been given write access to that directory. Sharing iCal Calendars Once you have WebDAV turned on, you can start sharing iCal calendars on the server. The following picture shows you how to set up iCal to publish your calendar, assuming that you're using the default values for the name of the WebDAV folder, login ID and password :
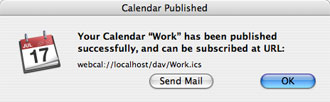
This assumes that you are publishing a calendar that is on your server machine. If you're publishing a calendar that is on some other machine, you will need to replace the word "localhost" with either the IP address of the server machine, or its domain name. The following shows the result of a successful operation :
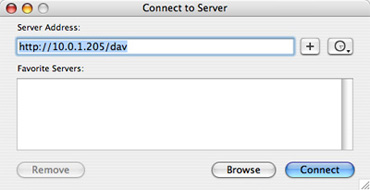
Sharing Files and Folders like an iDisk You can make the WebDAV folder act like your very own .Mac iDisk. This is how you can connect to it remotely, directly from the Finder. From the Finder menu, choose Go and then Connect to Server. You will see the dialog box below. Enter the domain name or the IP address of the web server that you have just set up using WebMon (in place of 10.0.1.205). Also, note that the protocol used is http and not afp or ftp :
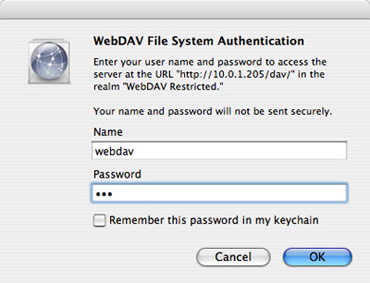
If your server is accessible and WebDAV is running, you will be asked to authenticate with it. Enter the WebDAV user ID and password (default "webdav" and "dav" respectively, unless you have changed it) :
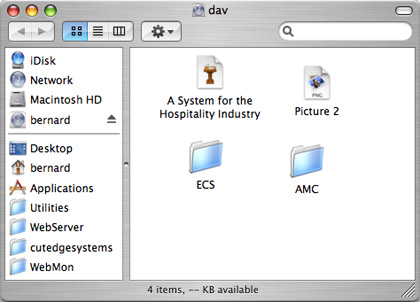
If you authenticated correctly, you will see your WebDAV folder directly on your desktop and you can drag files and folders onto it. Unlike ftp, you can actually double-click on these documents, launch the application (in my case, Keynote, because I have a Keynote document), and make changes to it.
WebDAV is "better" than using ftp because you have one less port to open (it uses the web server's port 80). It is a bit faster. And it integrates smoothly with the Finder, allowing you to work with the WebDAV folder like any ordinary Finder folder. Setting up SSL WebMon has an improved interface for managing SSL certs. When SSL is turned on at the server, and the browser accesses the web server with an 's' added to the http call, like this : https://cutedgesystems.com/software/WebMon/ all communications between the server and browser will then be encrypted.
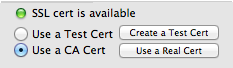
This option can be easily turned on with the use of a test cert that WebMon can help you generate (the "Create a Test Cert" button). First, make sure that the domain name that you're using to access the server is entered into the Domain Name field into the first column of the first record in the list of domains hosted by your web server (the main domain), like cutedgesystems.com, above. Then make sure to create the test cert. Also, make sure that your server "knows" itself by that name, i.e., it is configured to access a DNS Server where a lookup on that domain name will resolve to itself. This is important because three things must line up for SSL to work properly - the ServerName parameter, as set by WebMon in the Apache config file, the certificate itself, and the machine's DNS-resolved domain name - all these must agree on the same value. Then select the "SSL" and "Use a test certificate" options and hit Configure Web Server, and you will be able to access the web server by its domain name over SSL. Once you have an idea of how your web site might work with SSL on, you might want to get a real "live" cert from a Certification Authority (CA) like RapidSSL.
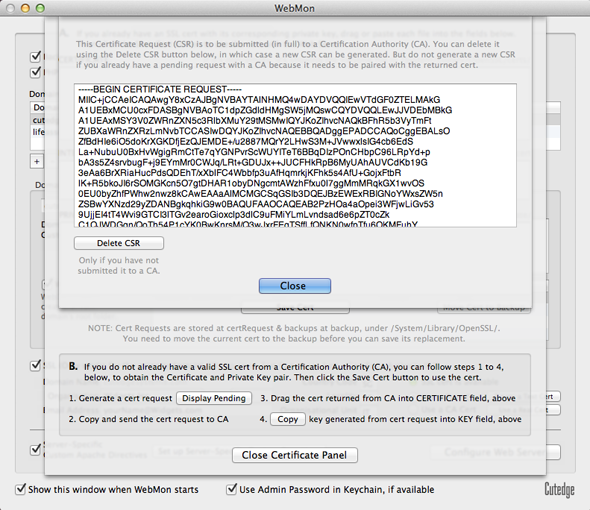
WebMon will help you generate the Certificate Request that is needed by a CA, below. You can reach this dialog box by clicking on the "Use a Real Cert" button.
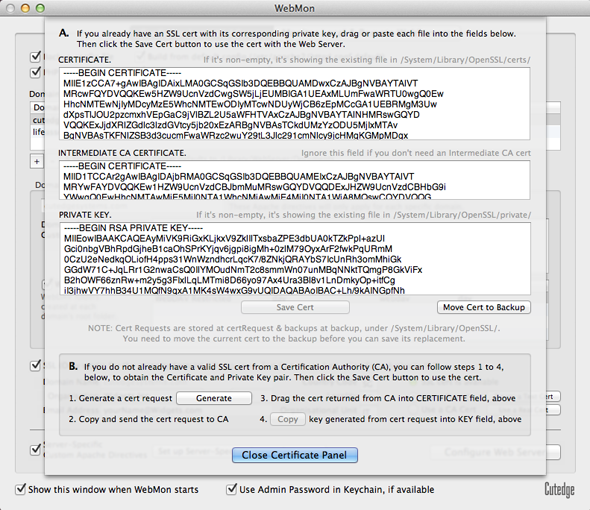
Once the certificate (text block) is returned from a CA, you can paste it back into WebMon, into the CERTIFICATE field, below. If the certificate require you to chain it to an INTERMEDIATE CA CERTIFICATE, WebMon has a field for that. Make sure you retrieve the PRIVATE KEY it should be paired with by clicking on the "Copy" key button. WebMon will take care of saving it into the right place.
WebMon will also allow you to import a pre-existing live certificate to be used with the web server. Just drag or paste the certificate and private key pair into their corresponding fields. and click "Save Cert". WebMon will then stash them into the right places in the /System/Library/OpenSSL/ folder for SSL to work when you hit the Configure Web Server button as you get out of the cert management dialog.
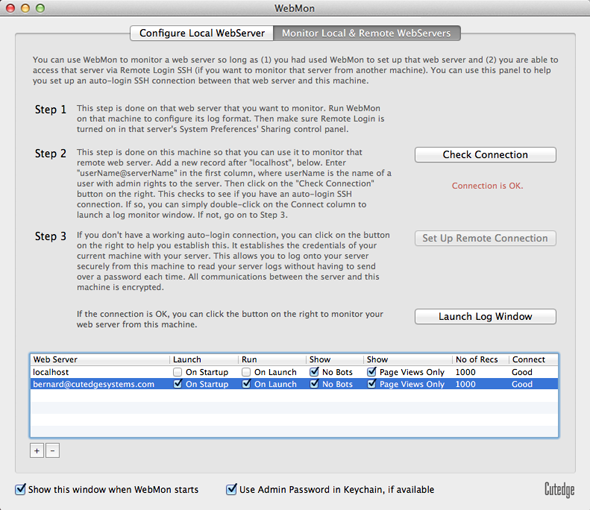
Monitoring the Web Server, both local and remote WebMon provides a web monitor for you to monitor the web server, both locally on the server machine, as well as from a remote machine running another copy of WebMon, so long as you have Remote Login turned on at the server machine in Sharing Preferences in System Preferences. Panel 2 of WebMon ("Monitor Local & Remote WebServers") allows you to do that. If you are able to ssh (remote login) into your server machine from a remote machine, you should be able to use WebMon to monitor the server remotely from another machine.
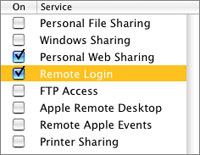
However, ssh and its auto-login feature (which allows you to connect to the server from a trusted machine without having to send over a password to initiate the login connection each time) is quite hard to do by an ordinary user. Therefore WebMon includes a facility to help you do that. You can do this in two steps. Step 1 - Test that Remote Login works while still on the server machine First you continue to work on the server and make sure that Remote Login (SSH) is turned on in the Sharing Preferences :
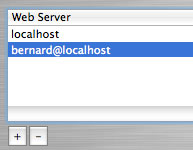
Then you add another record to WebMon's Web Server list as shown below :
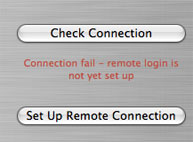
We use "username@localhost" (where username is the ID of an admin-level user on your server) because we can pretend to be logging in to our server via the SSH Remote Login mechanism, even though we're still working locally on the server. This allows us to test that Remote Login is properly configured before we move on to deal with the added complexity of connecting to our server over a network, e.g., before we have to deal with time-outs from having a slow network etc. Now with username@localhost selected, we click on WebMon's "Check Connection" button. If SSH is not yet set up, WebMon will warn us and turn on its "Set Up Remote Connection" button :
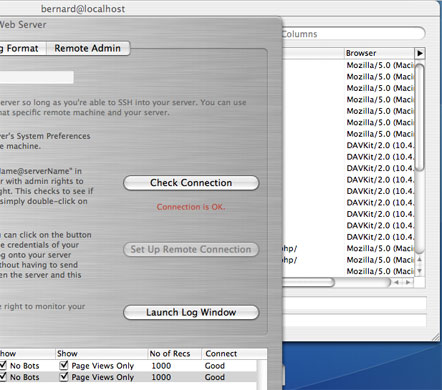
Clicking on "Set Up Remote Connection", WebMon will ask you for the administrator's password and attempt to set up the auto-login SSH connection. If the password given is correct and authenticated, WebMon will report that the connection is now OK, and you should be able to click on the "Launch Log Window" button and launch a log monitor window, as shown below :
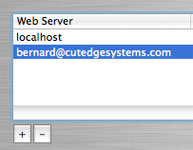
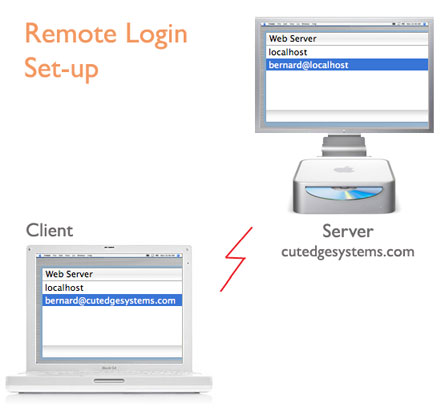
If you're able to get a list of the log records via username@localhost, it shows that your SSH Remote Login set up is working correctly. You can now go on to the final step, knowing that any problems connecting to your server from a remote machine is probably due to either time-out problems from a slow network, or due to firewall or other network issues, rather than an inability to set up the Remote Login connectivity properly. Final Step Assuming that our server can be reached via a domain name cutedgesystems.com, say, we now run WebMon on a remote machine, e.g., the administrator's personal iBook or PowerBook. We add a server for WebMon to monitor, as shown below :
We're now at a remote machine, connecting back to our server at cutedgesystems.com. You don't need to keep WebMon running at the server. The picture below is just to show that you use "bernard@localhost" while you're testing the SSH connection at the server, but "bernard@cutedgesytems.com" when you're accessing the server from another machine.
We do the same two things as in Step 1 above - click on "Check Connection" and then click on "Set Up Remote Connection" with our administrator's password to establish the credentials of our remote machine with our server machine so that the server will trust an incoming SSH connection from this specific remote machine. If the network doesn't introduce any problems, we should be able to establish a similar auto-login connection to the one before, only this time we're really connecting from across the network and so things work a bit more slowly now. If we're successful with the connection, we should be able to monitor the web server from our remote machine, as well as do any of the same configuration tasks that we had done locally.
The WebMon Web Server table allows you to list any number of servers that you might want to monitor from this remote machine. WebMon remembers the individual setting for each machine.
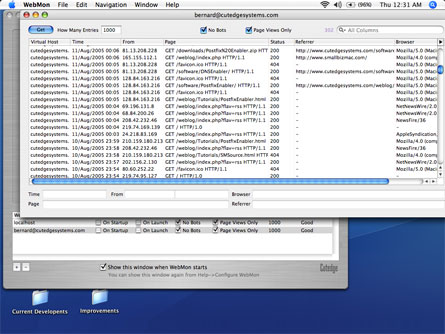
WebMon has two other Help menu items - Check for Updates, as well as a link back to this WebMon home page. WebMon's Log Window WebMon allows you to monitor your web server's in-coming hits through its log window, below :
WebMon's log window allows you to set the number of records you want to retrieve from the log file at /var/log/httpd/access_log, whether you want to ignore hits from bots and crawlers, and whether you want to show only page views and ignore the hits on images.
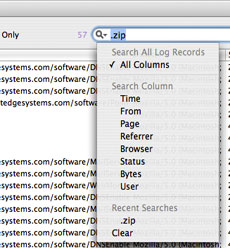
You can filter the display further through the use of the Search Field, below.
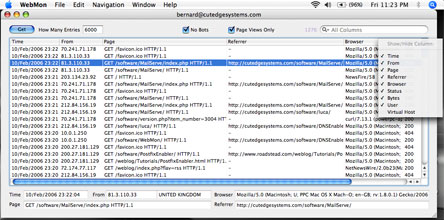
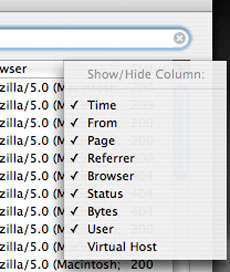
WebMon allows you to show or hide individual columns in the table through the use of the pop-up menu at the top right hand corner of the table :
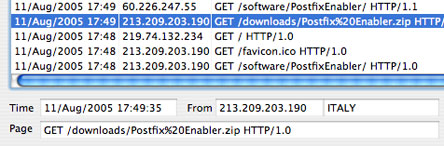
The column order can be re-arranged and re-sorted. WebMon will show you the details of each hit as you click on each row in the table, including the country from which the hit is being made, below :
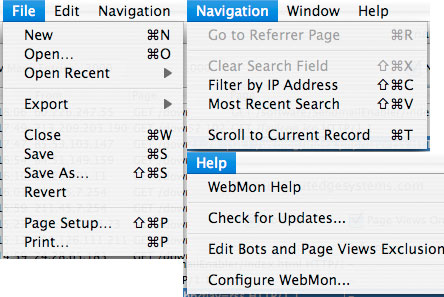
If the hit has a referrer, double-clicking on the record will launch the referrer page. With a record selected, you can do a Shift-Command-C and copy its IP address to the Search Field. This will immediately filter the display to show only the hits coming from this IP address, and this is useful for tracing the path taken by one particular browser through your web site. Other items in the Navigation menu allows you to clear the Search Field, return the search to the most recent search string, as well as scroll the display back to the currently selected record. WebMon saves the list of recent searches across application launches, as well as the size and position of the table columns.
WebMon's File menu provides you with two ways of keeping a persistent history of the log records - one as an exported file which can be read as either a tab-delimited or comma-separated file in Excel, and another as a saved file which can be read back by WebMon. WebMon is a Cocoa document-based application, so you can open as many windows of log records as you like. Finally, WebMon's Help menu allows you to edit the Bots and Page Views exclusion list, check for updates to WebMon, come back to this WebMon home page on the web, as well as to re-open the Configure Web Server window. Summary WebMon starts by working like MailServe or DNS Enabler, helping you set up a server machine, in this case the web server functions, but it goes a bit further, in the sense that it allows for remote monitoring of the server machine, and it allows you to monitor any number of servers from a single remote machine. It does things like WebDAV and SSL that used to be difficult for an ordinary non-techie Mac user to set up, and it does it all with the one-click simplicity of the Mac. It's one more step towards making the Mac the ultimate business machine. 7.0 October 23rd 2013. WebMon for Mavericks released. 7.0.1 October 26th 2013. Updated it with the latest IP address-to-country database. 7.0.2 December 20th 2013. Fixed a bug with the scrolling of the Monitor window (i.e., WebMon’s Log Window) in Mavericks. |
The serial number & download link will be displayed in the browser after payment, and will also be sent via email.
Please provide the email address you used to purchase the product, together with its serial no: |
||


Just one last word about WebMon's Configuration Window. WebMon allows you to turn off the Configure Web Server window on program startup, if you are through with configuring the servers. You can always bring it back by either choosing WebMon Preferences, or looking for it under the Help menu.